QuickScan Quick Start Guide
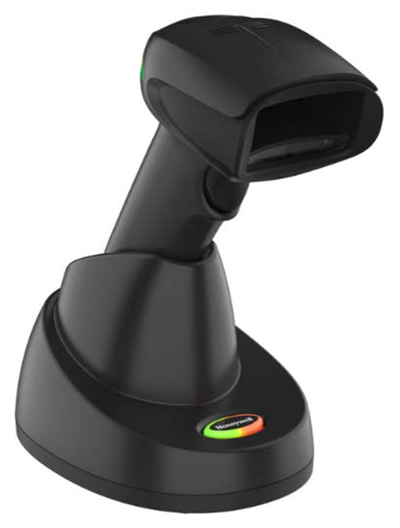
Wherever you are, the Follett Destiny QuickScan gives you real-time synchronization to your district's Destiny® Library Manager or Destiny® Resource Manager. With an intuitive, modern design, the QuickScan is easy to use, reducing your learning curve.
Get Started
Turn off your computer's power before connecting the scanner, then power up the computer once the scanner is fully connected. When the base is connected and powered up, put the scanner in the base to establish a link. The green LED on the base flashes to indicate the scanner's battery or charge pack is charging.
Power Supply Assembly
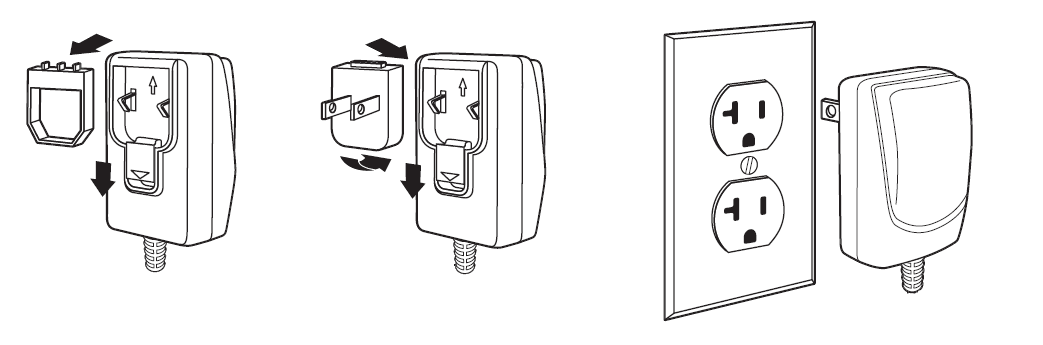
Power Supply
LED Indicators
The QuickScan and the base unit have both LED and audible indicators that provide the following information about their status.
| QuickScan | ||
|---|---|---|
| LED Indication | Audible | Status |
| Normal Operation | ||
| Red flash | None | Low battery |
| Green flash | One beep | Successful scan |
| Red, blinking | Error tone | Failed scan |
| Menu Change | ||
| Green flash | Two beeps | Successful change |
| Red, blinking | Error tone | Unsuccessful change |
Stream Presentation
When in Streaming Presentation Mmode, the scanner leaves the scan illumination on all the time and continuously searches for barcodes.
Test Scanner
Test your scanner by using the following procedure:
- On your workstation, launch a text editing program such as Simple Text or
- Notepad.
- Scan the test barcode below.

- Check to see if the number 12345 appears in the text editor. If the number does not appear, contact Follett Technical Support at 800.323.3397.
Connect Scanner
Use the diagram below to connect the scanner base unit to the power supply and the computer USB port.
- Plug USB cable into computer.
- Plug USB cable into base unit.
- Plug power cord into base unit.
- Plug power cord into electrical outlet.
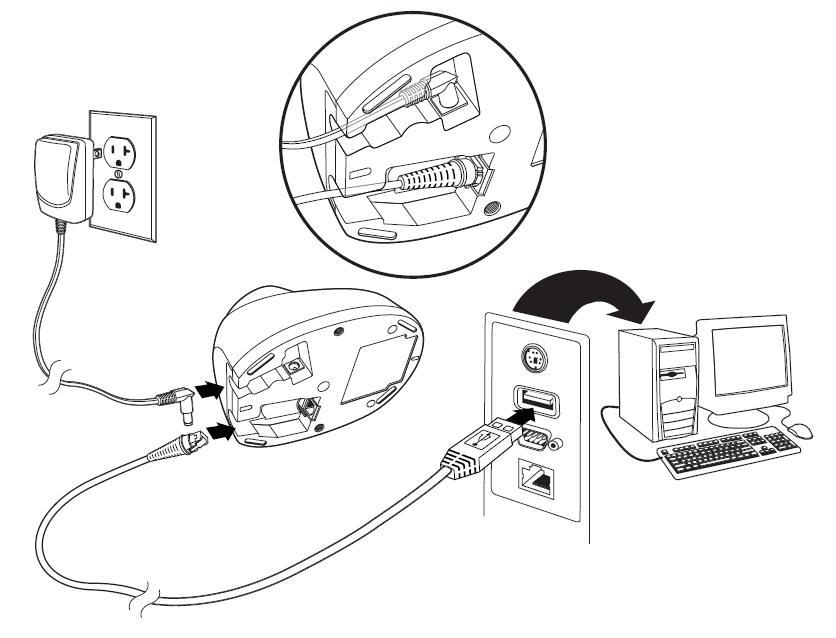
| Note: The QuickScan device charges with a USB cable to computer or via a general purpose USB wall charger. Charging with a USB wall charger is faster. |
Read Techniques
The view finder projects an aiming beam that should be centered over the barcode, but it can be positioned in any direction for a good read.
| Note: If the scanner beeps three times when scanning a barcode, the link has not been established. If the scanner beeps once, the link has been established. |

Standard Product Defaults
The following barcode resets all standard product default settings.

Enable the ScanHandle
The following barcodes will allow you to use the scanner in one of two modes.
- Manual Scanhandle - Normal Mode (Press the button on the scanhandle to read.)

- Presentation Mode (The scanner is activated when it detects a
barcode.)
| Note: Presentation Mode continuously draws power, so the use of an external power supply is recommended for this mode. |
| Base Unit | |
|---|---|
| LED Status | Cause |
| Red - Off | USB connection suspended |
| Red - On continuously | Power on, system idle |
| Red - Short blinks | Receiving data from scanner or host |
| Green - On continuously | Battery charged |
| Green - Rapid flash | Charging error |
| Green - Slow flash | Battery charging |
| Green - Off | Battery not detected, or charge suspended |
Click here to download the pdf.