Configure barcode symbologies
To let Destiny assign barcodes, you need to define the barcode symbology you plan to use. Barcode symbology options depend on the installed Destiny products.
|
example: You have Resource Manager and Textbook Manager. You make a change to the Textbooks barcode symbology. Even though Resource Manager also has textbook resources, your change only applies to the textbooks that live in Textbook Manager. Or, you have a Resource Manager-only site. The only product-related barcode symbology available is Resources. |
Define the symbologies
Before Destiny can assign barcodes, you must define the symbologies you plan to use.
- Select Admin > Site Configuration > Circulation sub-tab.
- Under Preferred Barcode Symbologies, use the drop-downs to select each resource's barcode symbology.
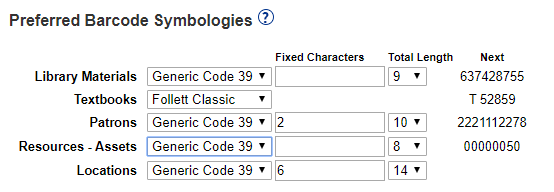
- Do one of the following:
- If a barcode contains less than 8 digits, select Follett Classic from the list.
Note: Follett Classic is not supported in Resource Manager.
- If a barcode contains 8 or more digits, the Fixed Characters field and Total Length drop-down appear. Complete as needed.
- If a barcode contains less than 8 digits, select Follett Classic from the list.
- Click Save.
|
notes:
|